Gingerbread Caramel Sauce

FullSizeRender-2Move over, sea salted caramel. You’ve had your 15-minutes of fame. Try this decadent gingerbread caramel sauce, a crazy crossbreed of fresh gingerbread cookies and rich caramel. This ice cream/cake sauce was posted on Martha Stewart’s site as an “under 30 minutes” holiday recipe. I latched onto it because it’s a gluten-free option that looked like a good Christmas gift for co-workers and friends. But I couldn’t give it away without knowing if it was actually tasty, so I did a test batch. How was it? Absolutely, positively, DEE-licious. I couldn’t stop licking the stirring spoon! When my friend Suzie texted me that her husband was smearing it on his breakfast toast just to find a base other than ice cream, I had to applaud his ingenuity. You go, Paul. Sauce it up.

Unfortunately, I couldn’t get a good photo of the sauce in action, as the ice cream melting under the warm sauce made a mushy mess in the bowl. That reminded me of my days working as an art director on Pillsbury cookbooks, and all the tricks we had to pull to get a shot of ice cream under hot studio lights. Here’s rule Number 1 in the food biz—if you’re selling ice cream, you must use your ice cream in the photo. No stand-ins. This required forming dozens of perfect scoops of ice cream, then putting them on dry ice for several hours. Then you had mere moments to pour the sauce and get your photos done. I had to blow through a straw onto the sauce to keep it from frosting over on the hyper-frozen ice cream, while the photographer furiously clicked away. So much work! But what fun to finally get the shot.

Food biz rule Number 2—if you’re selling the sauce but not the ice cream, you can use a salted dough (similar to Play-Doh) that mimics ice cream in appearance. A couple scoops of the salt dough handled the sauces well, and wouldn’t melt under the hot lights. It made for a much easier photo shoot day! Since I didn’t have any stand-in ice cream on hand, my shot above is of my sweet little jars all sealed and labeled for gift-giving.

Makes 6-7 half pints

3/4 cup molasses
3 cups sugar
2 cups heavy cream
1½ sticks cold unsalted butter, cut into small pieces
1-1½ teaspoons salt
1½ teaspoons ground cinnamon
1½ teaspoons ground ginger

In Dutch oven, combine sugar, molasses, and ½ cup water. Heat over medium-high, gently stirring, until sugar has dissolved. Bring to a boil. Continue to cook and stir constantly for 4 to 5 minutes (about 250 degrees on a thermometer, if using). Remove from heat and carefully whisk in cream, butter, salt, and spices, stirring until butter is melted and combined. Ladle into clean half-pint jars; wipe rims of jars to remove any excess sauce. Put on fresh, clean canning lids, and screw on top. Cool jars in refrigerator. (Jars may seal due to rapid cooling.) Once opened, sauce can be refrigerated for up to 2 weeks; reheat before using.

NOTE: I found it works best to have all your ingredients measured out before you start making the sauce. The butter and the cream will make the sugar mixture splatter when added to the pot, and may cause it to cool too rapidly. I turned the heat back on to low to get the butter to melt at this stage. Also, it’s best to sift in the spices and salt, otherwise the cinnamon and ginger tend to clump because the sugar mixture is so hot. As far as the salt content goes, I think the 1½ teaspoon salt was a little much, and will back it off to 1 teaspoon in future batches.

Nette’s Cranberry Salsa

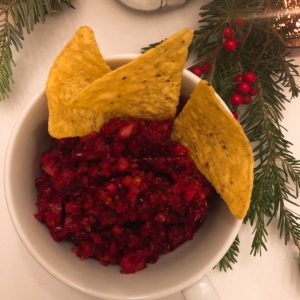
FullSizeRender-2Tomato salsa is so last year! This cranberry salsa has some kick and some sass, just like my neighbor Nette—which is fitting, since I got this recipe from her. You’ll need a food processor or blender to make it, but if you’ve got the tools, it’s a snap to whip up. If you serve it with corn tortilla chips, it’s both gluten-free AND dairy-free—how many appetizers can make that claim? Not many! At least not the appetizers found on most midwestern buffets in the cold winter months. And if you need more incentive to try this recipe, take note that cranberries are higher in antioxidants than the highly-acclaimed blueberry, and offer 24% of your daily allowance of vitamin C. So stick THAT on your chip and eat it. (Smiley face…)

1 Granny Smith apple, peeled, cored, and cut into slices
½ cup granulated sugar
½ cup chopped red onion
Zest of 1 lime
Juice of 1/2 a lime
1 fresh jalapeño pepper, seeded and membranes removed, and coarsely chopped
2 tablespoons chopped pickled jalapeño (like Mrs. Renfro’s brand)
2 tablespoons chopped fresh cilantro
1 (12-ounce) bag fresh or frozen cranberries, rinsed and drained

Combine apple, sugar, onion, lime zest and juice, fresh and pickled jalapeño, and cilantro in a food processor or blender and pulse several times. Add cranberries and pulse until grainy. Refrigerate for 1-2 hours before serving for flavors to blend. Serve with tortilla or pita chips.

Ginger Crisps with Cranberry Goat Cheese, Pear, and Pepitas

IMG_1298It takes longer to say the name of these delicious, sweet and savory appetizers than it takes to make them. With only 4 ingredients (see picture below) and no cooking or baking required, you can churn these out in a snap, as long as you’ve got the right stuff on hand. Purchased ginger thins are the base, and they can be found at a variety of stores. I used to only be able to find Anna’s Ginger Thins at high end grocery stores like Lund’s, Byerly’s, and Kowalski’s. While they still carry these, you can also find them at Walmart or even Walgreen’s right now. (I believe those two places only carry them seasonly, so if you’ve got a craving for these appetizers in the spring or summer, check at the aforementioned places.) Trader Joe’s carries something called “Triple Ginger Cookie Thins” and are about $4 per box. Again, they only carry them when people are gaga for ginger and pumpkin flavors. Not sure that the “triple ginger” claim makes them taste any different than the other brands… But I think the best value can be found at IKEA, where they sell a large box of Pepparkakor for $7.99, and the cookie/crackers are bigger and sturdier, like any good Swede should be.

FullSizeRenderThe other seasonal ingredient you need is a small log of cranberry goat cheese. Goat cheese straight up is a little too pungent for my taste, but with the addition of the sweetened cranberries, it’s perfect on these little appetizers. They sell this at just about any grocery store in the fall and winter—high end to Trader Joe’s. I even found a brand called Celebriti’s Cranberry Goat Cheese at Costco this year. For the fruit, you can use any type of pear for this recipe (Bartlett, Anjou, etc.), but the Red Anjou looks especially festive on top. 

The last ingredient is a sprinkling of tasty little pepitas, roasted Mexican pumpkin seeds. These are sold in bulk at just about any grocery store, or pre-packaged at the high-end grocery stores. They taste similar to a sunflower seed, but you can eat the greenish shell after they’ve been roasted and salted.

Whew!!! That enough info for you? Believe me, it’s worth the effort to seek out these special ingredients. These little taste treats are a perfect way to start anything—especially a New Year!

Serves 8-10

Rating: Super Easy

1 package Anna’s Ginger Thins, Trader Joe’s Triple Ginger Cookie Thins, or IKEA’s Pepparkakor
1 (8 to 11 ounce) package cranberry goat cheese, at room temperature*
2 Red Anjou pears, cored and sliced
¼ to ½ cup pepitas

Spread goat cheese on ginger thins. Top with slide of pear and a sprinkling of pepitas. Arrange on a platter and serve.

*NOTE: It’s easier to spread the cheese and not break the crackers if it’s room temp. You can make these with goat cheese straight from the frig, but you may have a few more broken cookie fatalities.

Gingerbread City Under Glass

FullSizeRenderMost gingerbread houses can put you into a sugar coma just by glimpsing the confections, dripping with achingly sweet icing, and loaded with candy canes, gumdrops, and peppermint discs. I’ve made my share of gingerbread structures with my kids—either making the dough from scratch and assembling the houses, or using graham crackers for the house, and getting right to the decorating fun. But the cost for all that candy really adds up! And then it seems like a waste to buy all those tasty treats, and then never actually eat them, right? So when I saw this gingerbread city featured in Better Homes and Garden magazine in December 2013, I was intrigued. No messy, sticky frosting? No bulk candy to buy? I’m in!

While I got my templates from the magazine, there is a simple template for the building dimensions online (to download it, you may be required to sign up for receiving emails from BH&G). The template is just the basic shapes—how you define the buildings will require you to call on your own creative juices. Scoring the windows, doors, and rooftops is what gives the 2-D houses their character, and gives the powdered sugar a place to settle and create the frosty outlines on the buildings. It was the easiest, neatest gingerbread project ever! My college-age son helped me, and we were both pleased with the process as well as the end result. And the gingerbread tasted great, too. 

You will need a 2-gallon glass canister, like the Anchor Hocking one pictured here. (I got mine at Walmart.) And you will need to pour a couple inches of granulated sugar into the bottom of the container to anchor the houses, which seems like a waste of sugar again. Not so, Santa’s little helper! If you keep the lid on your “city,” you can re-use the sugar for baking after the holidays are over. And the added benefit is that the sugar smells heavenly from having had gingerbread nestled in it, and it actually enhances your baked goods. So if you’re done with all your shopping, wrapping, and baking, and are just sitting around twiddling your thumbs until Christmas comes (ha!), take some time to create memories with this gorgeous centerpiece.

Makes about 6 buildings, and extra dough for trees, etc. About 72 servings.

5 cups all-purpose flour
1 tablespoon ground ginger
1 teaspoon baking powder
1 teaspoon salt
1 teaspoon ground white pepper
1 teaspoon ground cinnamon
1/2 teaspoon ground nutmeg
1 cup butter, softened (2 sticks)
1 cup packed dark brown sugar
1/2 cup molasses
1 egg
1/2 cup milk
Powdered sugar for decorating
Granulated sugar for decorating

In a large bowl combine the flour, ginger, baking powder, salt, white pepper, cinnamon, and nutmeg. Set aside.

In a large mixing bowl beat together the butter, brown sugar, and molasses on high speed until light and fluffy. Add egg and beat until smooth. Add half the flour mixture; beat until just combined. Add milk; beat until just combined. Add remaining flour mixture; beat until just combined. Using your hands, knead dough until smooth then divide in half. Wrap each dough half with plastic wrap and chill for 30 minutes.

Preheat oven to 350° Fahrenheit. Roll each dough half on parchment paper into about a 15×10-inch rectangle. Using a sharp knife, score free-form building and rooftop shapes (or use templates) on each sheet of dough without cutting through dough. Using a cookie cutter, cut out trees. Transfer each parchment sheet of dough to a 15×10-inch baking pan. Remove excess dough scraps. Using a straight edge or knife, add brick and window scores without cutting completely through dough.

Bake 10 minutes. Remove from oven. Carefully cut along scored lines of building and roof shapes. Bake 10 minutes more or until firm. Remove from oven. Cook completely on a wire rack. Separate gingerbread pieces.

Sprinkle powdered sugar over cookies and gently rub in. Cover with waxed paper and let stand for 30 minutes or up to 24 hours. Arrange cookies in 2-gallon glass container filled with 2 to 3 inches of granulated sugar to help stabilize cookies.

Chocolate Cherry Christmas Mice

FullSizeRenderThese darling little mice are adorable additions to any Christmas cookie platter, a welcome relief from all the buttery treats. My Mom introduced these into her Christmas baking ritual a couple decades ago, and has made them faithfully every year since. If you decide to make these, just know they are a labor of love—this is a time-intensive food project! But we all feel it’s well worth my mother’s time to make ’em. (Heeheehee) Chocolate cherry mice have become such a fave with certain family members, that Mom made my nephew Gebre his own personal box of critters for Christmas one year. (The kicker is, she doesn’t even like the chocolate-cherry combo!) When my niece Mikaela was really little, she once asked my Mom, “Are you making those rats again for Christmas, Grandma?” Guess this is one case where it’s OK to have rodents in your kitchen.

IMG_1271While this isn’t really a kid-friendly project, you could enlist the help of youngsters to unwrap (and not eat) the Hershey’s kisses you need for the mouse heads. You will need to have all your supplies out and in order to be ready to assemble these. Once done and cooled, they can be frozen, but preferably not stacked. My mother stores her sweet treats in an old (but clean!) film reel canister, the perfect thing for storing these in the freezer. If you didn’t have the advantage my Mom had of working in an AV department and scoring a find like that, look around for other large, flat containers for storage.

Roughly 48 mice

2 bottles (8-ounces) maraschino cherries with stems, rinsed, drained, and dried with paper towels (FOR BODY AND TAIL)
12-ounce bag of Hershey’s kisses, milk chocolate (or dark), unwrapped (FOR HEAD)
7-ounce container of Baker’s dipping milk chocolate (or dark), heated per directions on package*
100 sliced almonds (FOR EARS)
Tube of red gel decorating frosting (FOR EYES)

Have a baking sheet lined with wax paper ready for assembling mice. Holding cherry by stem, dip cherry and part of stem into melted Baker’s chocolate. Hold above container to let excess chocolate drain off cherry for a few seconds. With other hand, hold Hershey’s kiss by point end, flat side up. Lay two almond slice “ears” on top of Hershey’s kiss, and press on to cherry and allow chocolate to pool around “ears” and “head.” Hold Hershey’s kiss “head” onto cherry for a few seconds until it appears it is cooled enough to stay on it’s own. Once all the mice have been assembled, add two beady eyes to each mouse with the gel frosting. Store cooled mice in airtight container. Freeze.

*NOTE: You will need to reheat dipping chocolate occasionally as you work. If it thickens as it cools, do NOT add water to chocolate!!! It will turn into a solid brick. Add a bit of shortening and heat to make it creamy again.

Cranberry Conserve

FullSizeRenderDon’t bother with canned cranberry sauce, the stuff that “schluuuuuuurps” out of the can on it’s way to the serving bowl, maintaining it’s telltale ridges. This fresh and tangy relish is the perfect accompaniment to turkey or ham, and has a variety of other uses too. What can of cranberry sauce can make that claim? This recipe came from a Better Homes & Garden magazine sometime in the 90’s, and I’ve been making it every year since I stumbled on this gem. I can’t wait for cranberries to appear in the store so I’ll have jars of this on hand for our family, or to give as hostess gifts over the holidays. (This year I was lucky enough to get a beautiful bag of marble-sized berries from my friend Monique, who got them at a cranberry festival in Wisconsin. Thanks, Mo!)

FullSizeRenderIf a dollop of this relish on your roasted bird isn’t your thing, then try spreading it on some sour dough bread or gluten-free 100% rye bread (pictured here on Trader Joe’s bread), top it with slices of that leftover turkey or some deli ham, Swiss or provolone cheese, and finish with thin slices of Granny Smith green apples. Best sandwich EVER!!! This also makes a nice addition to a wine and cheese tray. The sweet and tangy pairing perfectly compliments aged cheeses and red or white wine. (Or so I’ve been told—I don’t do alcohol…) Or make a quick appetizer with some hearty crackers or earthy flatbread topped with warmed brie or cold cream cheese, and then some cranberry conserve. Give this recipe a whirl, and tell me how YOU liked it best!

IMG_1222IMG_1226Have to tell you this is the first recipe I’ve posted that warranted a trip to the after-hours clinic. My wonderful son, Mitchell, had kindly sharped my knives this week, and then I was commenting on how great it was to work with these super sharp knives while chopping the onions, and WHOOOSH! Off goes a chunk of my thumb, nail and all. My husband layered on the Band-Aids, and I finished the conserve. (Because I’m just that dedicated to my food preparation.) Then I went to the clinic to get a tetanus shot and properly bandage my wound. So all those jars of cranberry conserve lined up like little soldiers on my kitchen counter are extra special this year!

Makes 12-13 half-pint jars

Ease rating: medium (My sister Judy would never make this, so I’ll bring her a jar.)

2/3 cups packed dark brown sugar
2/3 cups butter
4 teaspoons white vinegar
3-4 large yellow (milder flavor) or red onions (stronger flavor), chopped
8 cups fresh or frozen cranberries
1 cup raisins
½ cup apple cider or apple juice
½ teaspoon ground allspice
½ teaspoon ground cloves
7 cups granulated sugar
2 cups toasted pecans, chopped

Wash 12-14 half-pint glass jars in hot soapy water, or in dishwasher. Set upside down on clean towel to dry. Fill medium sauce pan with water and bring to a boil. Turn off heat, and drop in 12-14 Ball or Kerr canning lids. Let sit until ready to use.

In a large skillet, cook and stir brown sugar, butter, and vinegar over medium heat for 1-2 minutes. Add onions and cook uncovered over low heat for 10-12 minutes, or until onions are glazed and tender. Stir often. Set aside.

In 8-quart kettle or Dutch oven, combine cranberries, raisins, cider or juice, allspice, and cloves. Bring to a boil, stirring occasionally. Continue to cook, uncovered, on medium heat for 5 minutes. Stir in cooked onion mixture and granulated sugar. Return to boil and cook uncovered for 10-15 minutes more. As mixture thickens, stir frequently to prevent sticking. Remove from heat and stir in nuts. (May seem thin after cooking for the 10-15 minutes, but it will thicken up significantly as it cools, so do not over cook.)

Pour conserve into prepared glass jars, filling to 1/4-inch from top. Wipe rim of jar with clean towel to ensure there is nothing on rim, then pull a lid from sauce pan, and place rubber side down on top of jar. Add screw top band and tighten. Place jar upside down on counter. Repeat with remaining jars until all are filled. Let jars sit upside down for 5 minutes, then turn over to cool completely. As jars “plink” you will know they are sealed. If any do not seal, place in freezer. Will keep for up to a year.

Rutabaga Whip

FullSizeRender-1Get some variety in your veggies with this easy rutabaga side dish. If you’re Scandinavian, chances are you’ve grown up on this meat-and-potatoes staple, and if you’ve not tried this root vegetable yet, you’re in for a treat. I found this basic recipe in my ancient Better Homes and Gardens cookbook ( you know, the one with the 80’s helmet-haired ladies I’ve mentioned before…). The only trick is letting the rutabaga chunks boil until they are good and tender before adding the potatoes. Rutabaga takes much longer to boil than potatoes do, and it’s tempting to think they are done before they are. We love these as a side to roast pork, smoked ham, or grilled chicken—they just have a little more flavor than plain old mashed taters, and are great when you’re craving some comfort food but want to switch it up a tad. And this may be easy, but it’s still worthy of a place at your Thanksgiving or Christmas table. (Rutabaga whip is pictured here with smoked pork roast, courtesy of my husband, and a golden melon, grapes, and raspberries, drizzled in a simple mint and lime syrup, courtesy of my friend and fabulous cook, Karin.)

As Thanksgiving is approaching, I’m going to be posting some of my favorite holiday side dishes the next two weeks. Most of you probably have your go-to family recipes at the ready—like grandma’s stuffing recipe—but if you’re in the mood to shake it up a bit or add to your répertoire, you’ll have some options.

Serves 6-8

Rating: easy

1 rutabaga, peeled and cut into 1-inch cubes
2 red potatoes, peeled and cut into 1-inch cubes
1 tablespoon granulated sugar
1 teaspoon salt
2-4 tablespoons butter
2-4 tablespoons milk
Additional salt and pepper to taste

Fill large saucepan or small Dutch oven half full with water. Add rutabaga, sugar, and 1 teaspoon salt to the water, and bring to a full boil. Reduce to medium heat, and cook rutabaga for about 20-25 minutes, or until tender to a fork. Add in potatoes, and return to a boil. Reduce to medium heat again, and boil for additional 10-15 minutes, or until all vegetables are tender when prodded with a fork. Drain off water. Place cooked rutabaga and potato in mixing bowl fitted with wire whisk attachment, or food processor bowl. Add butter and milk, and whip or process until smooth and creamy. Add salt and pepper to taste.

Cranberry Pecan Bars

IMG_1157A pop of rich red makes these cranberry bars look special enough for company, yet these sweet-tart treats are easy enough to make any old day. With cranberries showing up in grocery stores soon, I thought I’d share this delicious recipe I found on www.food.com, sent in by Wisconsinite and cranberry-lover Bonnie Young. They use mostly kitchen staples, and mix up in just a few minutes. I found they work better with frozen cranberries, as the fresh tend to mush and bleed into the batter and that makes them not so pretty. But the frozen berries make the batter very stiff, so you have to pat (or smash, if that’s more your mood) it into the pan with a spatula. Worth the effort though—the result is a deliciously chewy cake-like bar with just enough tang to keep you wanting more.

Makes 12-15 bars

½ cup butter, softened
2 eggs
1½ cup granulated sugar
1 teaspoon vanilla
1½ cup all-purpose flour
1 teaspoon baking powder
¼ teaspoon salt
½ cup chopped pecans
2 cups frozen cranberries
Powdered sugar

Preheat oven to 350° Fahrenheit. Butter a 9″x13″ baking dish and set aside. In large mixing bowl, cream butter. Add eggs and cream again. Add sugar, and beat until light and fluffy. Add vanilla and beat again. In medium bowl, combine flour, baking powder, and salt. Gradually add to creamed butter and sugar mixture. Stir in nuts with large wooden spoon until combined. Fold in cranberries. Press batter into prepared baking dish and bake for 40-45 minutes, or until top of bars are light golden brown. (Bars may not appear to be cooked all the way through when removed from oven, but they will set up as they cool.) Sprinkle with powdered sugar and let cool to room temp before cutting with very sharp knife.

(Shout out to Monique Kleinhuizen, who brought me a huge bag of fresh cranberries—the size of grapes—from a cranberry festival her family attended in Wisconsin. Used them in the batch of bars pictures here. Awesome berries!!!)